Working With Files
Image Size and dimensions
Every component that uses an image has a set size for that image. Only images that fit a given component should be used with that component. Images not sized for a given component risk poor resolution and distortion. We have an easy-to-understand guide along with other image best practices that breaks down image sizes on a component-by-component basis:
Using Images From the Media Library
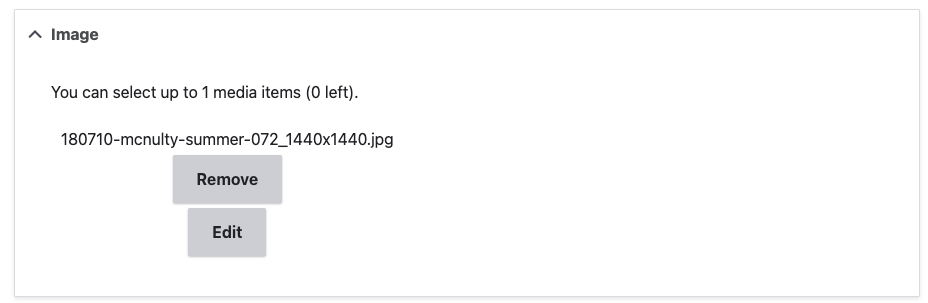
When editing components that use an image, there will already be an image in the component. To replace an image and put in a new one:
First, click “Remove” to remove the existing image.
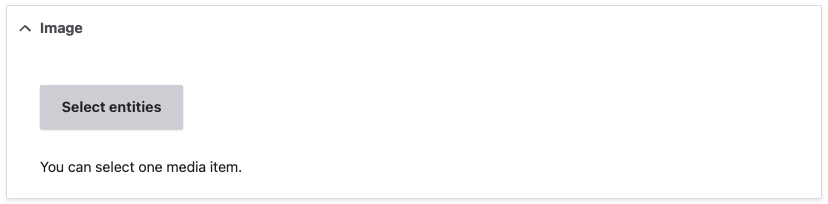
Then click “Select entities”
This will launch a pop-up.
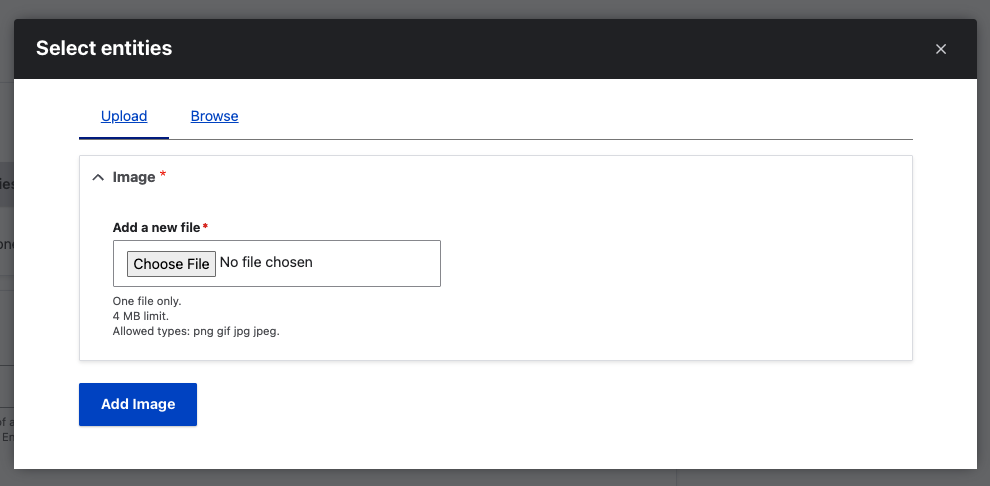
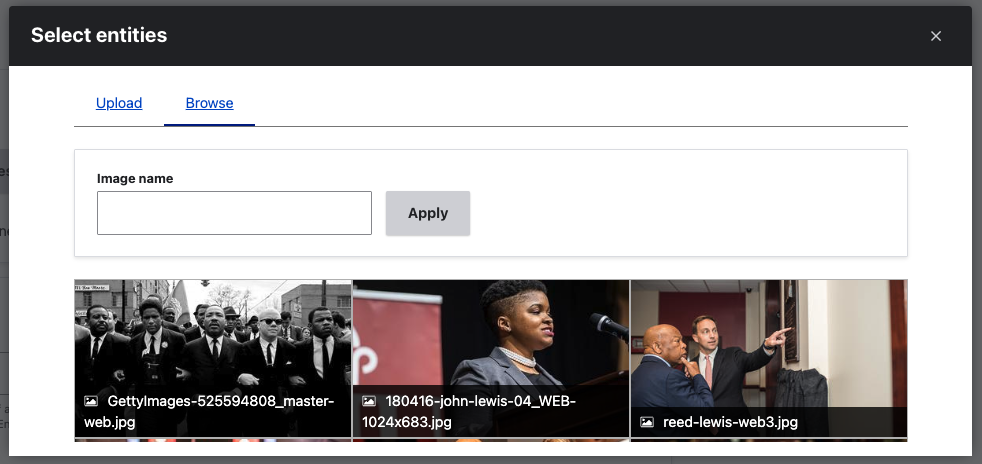
This will bring up a pop-up that allows you to choose which image is used. You have two choices at this point. Choose an existing image from the Media Library or upload a new photo to the site’s Media Library. To browse the Media Library on the site, click the “Browse” hyperlink. The resulting popup will look like this:
Images in Media Library
Our Drupal Media Library contains thousands of images ready to use on your pages.
- Determine the required image size for your selected component. Refer to the Image Size Guide for the correct dimensions.
- To search for an image, you can start by searching for a properly sized image for the component you are using.
- Enter the dimensions (e.g., "3200x1800") in the search field.
- Because of our media library's naming conventions, this will return a selection of properly cropped images.
- To search for an image using its title or description
- Enter a word or words (example: “Baberlin”) in the search field.
- This will return a list of images whose title contains your search terms.
- NOTE: If the search returns images that do not end in an image dimension, they may not fit your component.
- Click an image. A green check mark will appear.
- Once it’s there, click the blue “Select entities” button. If you’ve accidentally selected more than 1 image, you will get an error message and will need to start over.
Guide: Using an image from the Media Library
Uploading Your Own Images
You can upload images to the Media Library, but they must meet specific approval, cropping, naming, and compression guidelines.
Permissions and Approval
Before using an image on the website, you must get permission from the individuals featured in the image to use their likeness. We ask that you use our SJU Form of Photograph & Recording Consent and Release and keep it on file.
Permission must also be received for the use of third-party logos.
Cropping to a Specific Component’s Resolution Requirements
Each component has specific image size requirements to ensure optimal resolution and page speed.
- If the image you’re uploading is not yet in the Media Library, it must be cropped to the appropriate size specified in our Best Practices - images section.
- Detailed instructions on cropping your images to the correct size and resolution can be found here in our Image Cropping Guide.
Naming the Image
All uploaded images must follow a specific naming convention to ensure easy searching and proper organization.
Format: [description]-[date]-[size].jpg or .png
Example: students-walking-at-barbelin-spring-2024-3200x1800.jpg
Naming Breakdown:
- Description: Use 2-4 descriptive words separated by hyphens (e.g., students-walking-at-barbelin).
- Date: Use a general estimate of when the image was taken (e.g., spring-2024).
- Size: Include the image dimensions at the end (e.g., 3200x1800).
No spaces – always use hyphens. Keep everything lowercase.
Image Compression
All images must be compressed before uploading to ensure fast page load times.
- Use an image compression tool to reduce file size without sacrificing noticeable resolution.
- We recommend you use the following free online tool: https://imagecompressor.com/
Types of Images Allowed
- Images can be .jpegs, .jpgs, or .pngs.
- Do not upload GIFs to the Media Library. If a GIF is needed, please put in a request to the web team.
- Do not upload videos to the media library. If you wish to use a video, please contact the Web team.
To Upload an Image
- Click the “Choose file” button on the very first screen you see after clicking the gray “Select entities” button.
- Choose the file on your computer you wish to upload.
- Make sure it follows the appropriate naming convention.
- Upload it to the site.
Alt Tags
All images must include an alt tag to meet accessibility standards and improve SEO.
After uploading an image, you’ll be prompted to enter an alt tag describing it. Alt tags help screen readers describe images to visually impaired users.
- These simply need to be short descriptions of what is pictured in the image.
- Example: "Students working in a science lab"
Using Images From the Web Digital Asset Manager (DAM)
Saint Joseph’s University has a Digital Asset Manager (DAM) with an extensive collection of images not included in the media library. You can download images from the Web DAM and upload them to the Media Library after properly sizing them for the component in which you intend to use them.
Browse the Web DAM
Access to the Web DAM requires that you have an existing account. To get your account set up:
- Go to the Web DAM site.
- In the upper right-hand corner of the page, click "Register" and complete the form.
- Your password does not necessarily have to be your SJU password, although you are free to use it.
- Your request will be approved within 72 hours.
Working With Documents
Documents can be linked to in the WYSIWYG editor, but they should never be directly uploaded to the Media Library. Please use Google Drive instead. Google Drive.
Google Drive can be used to host:
- Google Files (Docs, Sheets, or Slideshows)
- PDFs
- Microsoft Office files (Word, Excel, PowerPoint)
- Other department documents that require frequent updates.
As is the case with most Google files you can:
- Specify whether the file you are sharing is restricted to only:
- users in certain groups
- users at Saint Joseph’s, or
- anyone with the link.
- Set editor or viewer status. Note: For Google Docs posted to our websites, please use “Viewer” status only.
If you want your page to link to a document, follow the steps you would take to link to a URL.
- Type out your link text.
- Highlight it with your cursor.
- Click the link icon in the WYSIWYG editor
- Enter the publicly shareable link to your document.
Google Tips Sharing Links
Here are a few useful Google tips that may save time when sharing links.
Prompting SJU Login:
- If the Google Drive file requires an SJU login, you can add “/a/sju.edu/” to the sharing URL to prompt the SJU login screen if the current Google user is not logged into their SJU Google Account
- Example:
- https://docs.google.com/a/sju.edu/document/d/hrdijKlYGDV3aNvUeaTtKBrPMVTl4vu31vcxXDjmZ3FWZ87aEJyNb/edit#
URL Tricks:
- Previewing Link:
- To preview the link, add “/preview” to the end of the sharing URL.
- Example: https://docs.google.com/document/d/16BjzZqQd7HVy9qc7yFca1jJupOmZCpDflC8OrP22eL4/preview
- To Preview and Copy the Link:
- To preview and copy the link add “/template/preview” to the end of the sharing URL.
- Example:
- https://docs.google.com/document/d/16BjzZqQd7HVy9qc7yFca1jJupOmZCpDflC8OrP22eL4/template/preview
- To Copy the Link:
- To copy the link add “/copy” to the end of the sharing URL.
- Example:
- https://docs.google.com/document/d/16BjzZqQd7HVy9qc7yFca1jJupOmZCpDflC8OrP22eL4/copy
More URL tricks can be found here:
Using Videos
You can use video on your web pages, but please contact the web team. We will host the videos and deploy them for you. Please do not upload videos directly to the site's media library.
< Return to SEO and Meta Tags Learn About Faculty/Staff Profiles Updates >